What is macro nature photography?

By: Martha Barksdale
Image Gallery: Annual Flowers Macro nature photography lets you capture images of small, natural objects in a format that is at least life-size. See pictures of annual flowers.
Tancredi J. Bovosi/Getty Images

Although you probably don't have access to an electro-magnetic shrink ray like in the movie "Honey, I Shrunk the Kids," you probably do possess a tool that can give you an up-close look at the disdainful expressions of grasshoppers, the rugged terrain of a marigold leaf and the hairy appendages of a snowflake. With just a point and shoot digital camera, you can begin to explore the field of macro nature photography. If the macro bug bites you, you can invest a little cash for a few pieces of equipment and be well on your way to finding out what tiny surprises lie hidden in our own world.

The goal of macro photography is to capture details of a subject that the naked eye can't see. Macro photography is generally defined as photography in which the focus is close enough so that when the image is printed as a photograph, it appears at least as big as the actual size of the subject or even larger. In general, macro photography produces an image size ranging from life size, with a 1:1 ratio, to up to 10 times life size (10:1) [source: Smith]. The range of image ratios smaller than that, from 1:1 down to 1:10, is called microphotography or, more commonly, close-up photography.

Advertisement

In the days of film, macro nature photography was an expensive proposition, requiring expensive special lenses, extension tubes, micro bellows that further separated the lens from the main body of the camera--maybe even a reversing ring that let you put a lens on backwards and use it as a microscope instead of a telescope. But today, most digital cameras come with a macro mode setting. Just twist the dial, and you're focusing into the Lilliputian world of ladybugs and dandelion seeds. Still, when you turn over to macro mode, you're giving up control of aperture (how much light is allowed in from the lens) and shutter speed, which some photographers are loathe to do. They prefer the surety of manual settings and single lens reflex (SLR) cameras.

In this article, we'll look at the different schools of thought on macro nature photography. Whether you are satisfied with the ease of automatic settings or want to keep the control to yourself, keep reading to find out ways to get the shots that will satisfy you and possibly amaze your friends.

Advertisement
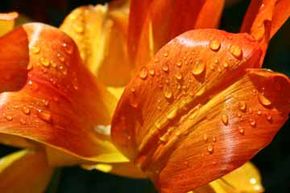
Macro Nature Photography Basics

Subjects are endless in the field of macro nature photography. Plants, animals, rocks, droplets of water and shards of ice are all right there -- free for the taking. You don't have to worry about model release forms or renting a studio. If you become skilled enough, you could even make a living from your passion. Magazines, especially those that are science- and nature-focused, often use macro shots to accompany their articles. Whole calendars are produced each year featuring magnified looks at nature. Of course, don't forget about textbook illustrations. Companies that provide stock photos for a variety of uses are always looking for interesting shots.

Although some aspects of macro nature photography might be easy, such as finding a subject, other aspects pose a challenge, such as getting your subject to stay still. Experienced macro nature photographers usually have a few tricks of the trade, such as carrying a small bottle of honey to feed to the butterflies to keep them around and "posing" awhile longer. Some photographers even go to the trouble of bringing along dead flies so they can get macro shots of a spider with her prey. You can anchor blades of grass with paper clips so they'll stay still for a photo.

Advertisement

Lighting in the great outdoors may not always be optimal, and the lens extenders needed to get primo shots make the lighting situation even more dismal by increasing the distance between the subject and the body of the camera where the shutter is. The disruption of a flash may startle your animal subjects and may cause the lens, which is close to the subject, to cast a shadow. You may want to overcome this problem by using a separate flash unit, which we'll talk about later.

Depth of field is usually very limited in macro photography, which some photographers see as a plus. The blurred background may indeed cause the magnified image to be even more impressive. However, if the background is important, experience macro photographers advise shutting off your camera's auto focus and homing in on the subject manually.

The type of camera you choose and the features it has will play a big part in how your photos turn out. Up next, we'll look at two different camera styles and examine their pros and cons for use in macro photography.

Advertisement

Full Frame or Crop Sensors in Macro Photography?

The question of full frame versus crop sensor cameras is yet another topic in the debate about the best way to execute macro photography. First, let's define the terms. A full frame 35 mm camera, whether digital or film, records an image that is 36 millimeters by 24 millimeters. When digital cameras were first created for the mass market, it was not possible to economically produce cameras with this size image sensor, so manufacturers decided to go with a smaller sensor, about 15 millimeters by 22.5 millimeters. So, if you take the image from a full size frame and crop a little off all four sides, you'll get the part of the image created by a crop sensor camera. Crop sensor cameras are digital only.

Probably the main difference between full frame and crop sensor cameras is how the focal length is affected. Even with the same lens, the shots taken with a full frame and a crop sensor camera would be different. The crop sensor's photo would be more magnified than the image captured by the full frame camera. For the macro nature photographer, this would be a distinct advantage. For instance, what would be a tiny photo of a firefly shot with a full frame camera would be a close-up when photographed with a crop sensor camera, even from the same distance. But you are trading some quality aspects. A larger image sensor will produce a better image than a crop sensor because the pixels will be larger. These larger pixels won't have to be magnified as much to get the finished image, producing less "digital noise" that can result in a grainy image. Full frame sensors also perform better in low light conditions.

Advertisement

Digital crop sensor cameras are not as heavy as full frame cameras and don't require the bulky telephoto lenses that are needed to get macro shots with a full frame camera. If you feel the need to experiment with lenses, a variety of lenses for digital cameras have come on the market in the past few years.

On the next page, we'll learn about those lenses and other equipment you can purchase to enhance your macro nature photography experience.

Advertisement

Macro Nature Photography Equipment

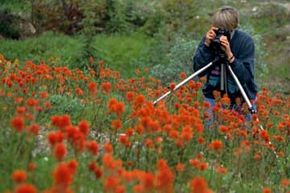
Accessories such as a tripod can help you keep the camera still and reduce blurriness in your images.
altrendo nature/Getty Images

While a few purists still use film cameras, most photographers have turned to the digital side. Aside from the fact that you get instant feedback and don't have to purchase rolls of film and lug them around everywhere you go, digital cameras -- for reasons we discussed earlier -- are suited to macro nature photography. You don't have to spend a bundle on one, either, although you can. A point and shoot with adjustable settings will get you started for less than $200, but if you want really professional shots, you'll need to move up to a DSLR. A higher quality small sensor camera, such as a Canon EOS, will run about $500. Of course, if you really want to go all out, you can spend $2,000 or more on a top of the line model for your macro nature photography.

More important than the camera are the lenses. Be sure to choose macro lenses, not macro zoom lenses, because the magnifying power of macro zoom lenses is not high enough for macro nature photography. To use them, you would have to get so close that you would interfere with your subject. Good 1:1 macro lenses sell for around $500. You can get lenses that shoot at a 5:1 ration for about $1,400. Choose the lens you need based on the distance from which you'll be shooting. Remember, the farther away you'll be, the longer lens you'll need.

Advertisement

Another way to increase magnification is by increasing the distance between the lens and the sensor with extension tubes or even a bellows. These have no optical components. Extensions can be used in conjunction with reversing rings, which allow a regular lens to be turned around and fitted onto the camera body backward. The reversed lens will magnify the subject, in some cases up to four times its normal size.

Auxiliary close-up rings are simple screw-on adapters attached to the camera's lens. They provide magnification and allow the camera to get closer to the subject. Lighting is a problem in the close confines of macro nature photography, and some photographers find that a ring flash attached to the front of the lens can be helpful to replace some of the light lost in such close-up situations.

But perhaps more important than the equipment you use in macro nature photography are the techniques you employ. Keep reading to discover some tips that will have you staring into the face of nature.

Advertisement

Macro Nature Photography Tips

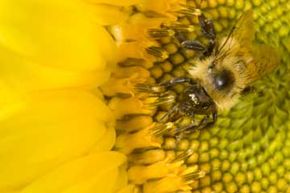
Getting all of your subject, such as this bee, in the photo is important to composition in macro photography.
Joseph Devenney/Getty Images

Let's face it: Mother Nature is not always accommodating when it comes to taking photos. Winds blow the subjects around; sunlight and shadow play havoc with exposures; and your animal and insect models are likely to run or fly away at the slightest provocation. Still, with all these obstacles, the astounding photos you can get from macro photography make the few extra precautions you need to take worth it.

Aperture is one of the most important factors in macro photography. On a point and shoot, use aperture priority -- AV on the dial -- to set your camera at its smallest aperture. On a DSLR, unless you're using special macro lenses, you're going to want to consider effective aperture, and adjust for it. Generally, when shooting at a 1:1 ratio, you let in less light than what you would normally would at a particular aperture. For example, an aperture of f/8 would become more like the smaller f/16. In macro photography, you need to know how to compensate for the effects of magnification on the aperture. Once you've focused, look at the lens markings to see what the effective aperture will be.

Advertisement

Using a small aperture means you'll need to use a slower shutter speed. This will result in increased camera shake, so many macro nature photographers rely on tripods to hold the camera steady. A tripod works well when you're photographing stationary objects such as plants and rocks, but not so well when you have your sights on a capricious dragonfly or hummingbird. In that case, the pros advise, just brace yourself as best you can, against the ground or a fence. Placing the camera on a solid surface and setting the camera's self-timer will eliminate camera shake if you don't have a tripod.

Composition is basically the same as for any other portrait. Don't cut off your subject at the knees or the elbows, even if they're bony praying mantis joints. Focusing may be the one of the more difficult techniques to master. Because of the limited depth of field, the area that's in focus is going to be fairly limited. You'll need to decide which area you want to highlight and concentrate on focusing on that.

Lighting is another variable over which you can gain some control. First, if possible, choose a bright day to shoot outdoors. Bright overcast days -- which sounds like an oxymoron, but they do exist -- are best. Also, a handheld flash will provide better results than the camera's built-in flash because you should have more control over it.

If you're ready to take out your camera and try macro nature photography yourself, but still want to learn more, visit some of the links on the next page.

Advertisement

Lots More Information

Related Articles

  • Atkins, Bob. "Crop Sensor (APS-C) Cameras and Lens Confusion." (12/22/09).http://www.bobatkins.com/photography/tutorials/crop_sensor_cameras_and_lenses.html
  • Digital SLR Guru. "Full Frame Vs Cropped Frame Sensor Cameras." (12/23/09).http://www.digitalslrguru.com/full-frame-v-cropped-sensors
  • Greenspun, Philip. "Macro Photography -- How to Take Close-Up Pictures of Small Things." Photo.net. (12/23/09).http://photo.net/learn/macro/
  • Hicks, Tom. "Macro Photography for Beginners." Shutterfreaks. (12/23/09).http://www.shutterfreaks.com/Tips/tomhicksmacros.html
  • Philips, Frank. "How to Do Macro Insect Photography." Beautiful Bugs -- A Collection of Tiny Portraits by Frank Phillips. 2004. (12/23/09).http://www.beautifulbugs.com/beautifulbugs/howto.htm
  • Plonsky, M. "Bug Pictures (Insect Macro Photography). Fine Art Photography. 11/14/03. (12/23/09).http://www.mplonsky.com/photo/article.htm#set
  • Smith, Barrie. "Macro Photography for Beginners--Parts 1 and 2." Digital Photography School. (12/23/09).http://digital-photography-school.com/macro-photography-for-beginners-part-1
  • Willey, Kevin. "Macro Lenses: Special Lenses for Close-Up Work." (12/23/09).http://www.kevinwilley.com/l3_topic05.htm

Advertisement

Loading...