How Bird Photography Works

By: Kathy Price-Robinson
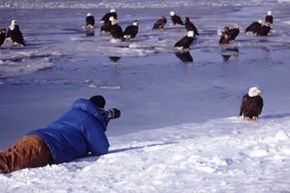
Winter wonderland of snow and ice.
Image Gallery: Birds Getting low to the ground makes you less startling to birds and helps you take great photographs. See more pictures of birds.
Alan Kearney/Photographer's Choice RF/Getty Images

If only bird photography worked like the human type and you could just point your camera, holler "cheese" and push the button. But yell anything at all to a streak-breasted jungle flycatcher and your rewards will be a flutter of wings, a quick swoop and an empty spot where the bird used to be. To understand bird photography, you must first understand bird psychology.

Except for birds of prey like eagles and hawks, most birds are prey, which means they and their young and eggs become food for other animals. Their methods for survival, therefore, include camouflaged appearances, hard-to-access nests and quickness to flight. Those survival strategies make bird photography more challenging than other types of wildlife photography. You can mitigate those challenges in several ways: knowing bird behavior and migration patterns and owning the right equipment and knowing how to use it. On top of that, add three traits you should have: patience, perseverance and willingness to practice.

Advertisement

To photograph birds, you first need to find them. That means you need to know where they live, where they migrate and when they migrate. You may hear that a certain beach or forest is alive with the sounds and sights of birds, but if you go during the wrong time of year, you may hear little more than an eerie silence. Each type of bird has its own habits and patterns, so learn about the birds that interest you before you attempt to photograph them. You can jump start your education by joining outings of a local birding club or Audubon Society, or you can check out the Northern Prairie Wildlife Research Center Web site, which provides information on bird migration patterns.

If you're a newcomer to bird photography, visit places where birds are accustomed to human activity, such as popular seashores -- your subjects will be less likely to scatter when you approach. Before you begin snapping photos, get low to the ground -- all the way down to your belly. This not only makes you a less startling and threatening visage to your subjects, but it also gives you the advantage of capturing them on their level, eyeball to eyeball. And really, isn't that the main enjoyment of looking at bird photos, to feel like you're right there with them?

Now that you understand some of the basics of bird photography, you may be wondering what kind of camera you should use. Keep reading to learn about bird photography equipment.

Advertisement
Bird Photography Equipment

According to the Cornell Lab of Ornithology, personal preference should dictate your choice of cameras, but Canon and Nikon cameras are consistently noted as favorites among professional bird photographers. The best type of camera to use is a DSLR, which stands for digital single lens reflex. The SLR format means compatibility and adaptability -- you have more control over the settings, and there's a wide variety of interchangeable lenses available.

Here are some factors to consider when choosing your camera and lens:

Advertisement

  • Manual vs. automatic: For the average consumer, a point-and-shoot camera with automatic default settings is ideal because these cameras don't require a lot of knowledge and training. But when it comes to photographing birds, you need more control to overcome poor lighting conditions and fast-moving subjects. The more default settings you can override with manual controls, the more your camera will operate like a professional's.
  • Speed: One camera may shoot three frames per second, but another may shoot only two frames per second. This may not sound like a big difference, but in the fast-moving world of birds, the frames per second can make the difference between capturing the image you want or just capturing the tip of a wing.
  • Telephoto lens: In much of photography, a 35 mm lens is sufficient. The 35 refers to the focal length and how much you can zero in on your subject. Lenses smaller than 35 mm are wide-angle lenses -- they allow you to capture wider scenes, but you can't focus on faraway objects. A 70 mm lens, however, gives you a narrower scope that focuses on distant subjects. Many bird photographers use lenses that are between 400 mm and 500 mm, but these larger lenses are typically expensive, heavy and difficult to maneuver.

Capturing a moving image, such as a bird in flight, takes more savvy than capturing a stationary one. Cameras rely on light making an impression on the receiving surface, and the longer you keep the camera open, the more light will enter through the shutter. If the camera lets in too much light, the image becomes washed out, but if the camera lets in too little light, the image is too dark.

Besides the speed of the shutter opening and closing, the amount of light that enters the camera is also dependent on how big the opening is -- this is called aperture. By creating different combinations of shutter speed and aperture, you determine how much light gets into the camera and for how long. When photographing a still image in low light, you may want a slow shutter speed and large aperture, but when photographing a fast-moving subject like a bird against a bright sky, the shutter speed needs to be quick. Keep reading for more bird photography tips.

Advertisement

Bird Photography Tips

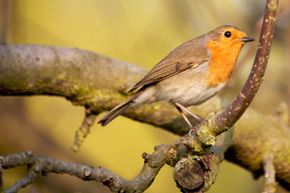
robin in tree
Catchlight helps bring a bird's eyes to life.
©iStockphoto.com/Chrisds

Most of us who photograph family and friends with our digital cameras rely on automatic settings to achieve success. With bird photography, however, one must learn how to manipulate a camera manually, knowing where the controls are while one's eye remains on the viewfinder. To get the best shot of a bird, several factors must work together. You need a good camera, a steady hand or tripod and good light. Ideally, your camera will sit steady on a tripod, but you can also use your car window, covered with a small sandbag, as a surface to rest the lens. Even when all other factors are favorable to good bird photography, a shaky hand or a small movement of the camera can render your images fuzzy and out-of-focus.

For those with an artistic eye, the composition of a photograph comes easily. These folks just instinctively know that photographing a bird with a red chest near a bush with red berries will help bring out the colors on the bird. But the rest of us may have to work to develop an artist's eye. The first step in doing this is to study good bird photography. Look closely at superior photos that appeal to you and ask yourself the following questions: What is it about this photo that I like? What is the foreground like? What is the background like? What is the relationship between the two? By closely studying such photographs, you can start to internalize the sensibility that will show up in your own photos. When you study these bird photos, also pay close attention to the light -- the light should be even and soft, not harsh. This means there aren't any dark shadows or intensely bright areas of contrast.

Advertisement

So how do you get the best light when you're out in nature and can't control the environment? The secret is to do your photography in the early morning or late afternoon. The times most-often noted by professional photographers as ideal are within two hours after sunrise and within two hours before sunset -- this is when the angle and intensity of the light is just right to bring out the texture and colors of your subjects. The worst time to photograph birds is noon, when the sun is overhead, unless it's a cloudy or overcast day.

You have the right equipment, an understanding of composition and a good idea of how to get the best light. But none of this matters if your subject spots you and darts away when you approach. To avoid this, you can try using a blind. In bird photography, a blind is something you hide behind so that skittish birds won't see you and fly away. There are three types of blinds: natural blinds, manufactured blinds and homemade blinds.

Natural blinds include trees, bushes, tall grasses and even your car. Manufactured blinds are found at sporting goods stores and are used by both bird hunters and bird photographers. Most will be tent-like structures with camouflaged colors and an opening for your camera lens. Homemade blinds can be a cardboard box or even simply a blanket on a clothesline with a hole for the lens. For more comfort, consider using a picture window covered up except for the lens opening. However, for this method to work, you need to attract birds to your yard. Keep reading to learn how to do this.

Advertisement

Creating a Backyard Bird Refuge

Part of the appeal of being a bird photographer lies in the opportunity to head out of town on "hunting" expeditions. You see new parts of the state or country and more fully appreciate the natural world we live in. However, staying home and photographing birds also has its benefits. The trick, of course, is getting the birds to come to you.

To attract birds, you just need to understand their basic needs: food, water and shelter. By simply filling your yard with birdfeeders, plants that produce fruit and berries, birdhouses and birdbaths, you're creating a haven for the birds in your area. Fill feeders with seed, regularly pour clean water into birdbaths, and keep the yard free of predators -- especially your pet cat -- and you'll have plenty of wildlife to photograph.

Advertisement

Your backyard birding can provide a place to hone your skills before heading out on weekend expeditions, and you can learn how your camera works, observe how certain birds behave and practice capturing different images. When you're ready for a birding expedition, you want to go where the birds are. According to The Nature Conservancy, these are the top 10 birding hotspots in North America:

  • Aleutian Islands, Alaska
  • Cape May, New Jersey
  • The Everglades, Florida
  • Gulf Coast, Texas to Florida
  • Monterey Bay, California
  • Newburyport, Massachusetts
  • Pawnee Grasslands, Colorado
  • Point Pelee, Ontario
  • The Rio Grande Valley, Texas
  • Southeast Arizona

[source: The Nature Conservancy]

You can also check out the Top 200 American Birding Spots to find the best birding areas in your state. For beginners, though, joining birding organizations and attending outings is a shortcut to learning everything from scratch.

See the links on the following page to learn more about bird photography.

Advertisement

Lots More Information

Related Articles

  • Cameras and Lenses. Cornell Lab of Ornithology: All About Birds.http://www.birds.cornell.edu/AllAboutBirds/bp/lenses/document_view
  • Gallagher, Tim. "Developing an Artist's Eye." Cornell Lab of Ornithology: All About Birds.http://www.birds.cornell.edu/AllAboutBirds/bp/tim1/document_view
  • Horn, Bill. "Film or Digital: Which is best for you?" Sept. 2006. Cornell Lab of Ornithology: All About Birds.http://www.birds.cornell.edu/AllAboutBirds/bp/horn/document_view
  • Line, Les. "Shooting Like a Pro." Audubon Magazine.http://www.audubonmagazine.org/backyard/backyard0101.html
  • Migration of Birds. Northern Prairie Wildlife Research Center. U. S. Dept. of the Treasury, U.S. Geological Survey.http://www.npwrc.usgs.gov/resource/birds/migratio/patterns.htm
  • Morris, Arthur. "The Art of Bird Photography."https://store.birdsasart.com/shop/item.aspx?itemid=16
  • Principles of Birding Ethics. American Birding Association.http://www.aba.org/about/ethics.html
  • Wolfe, Steve. "Birds in Flight." Sept. 2006. Cornell Lab of Ornithology: All About Birds.http://www.birds.cornell.edu/AllAboutBirds/bp/flight/document_view

Advertisement

Loading...